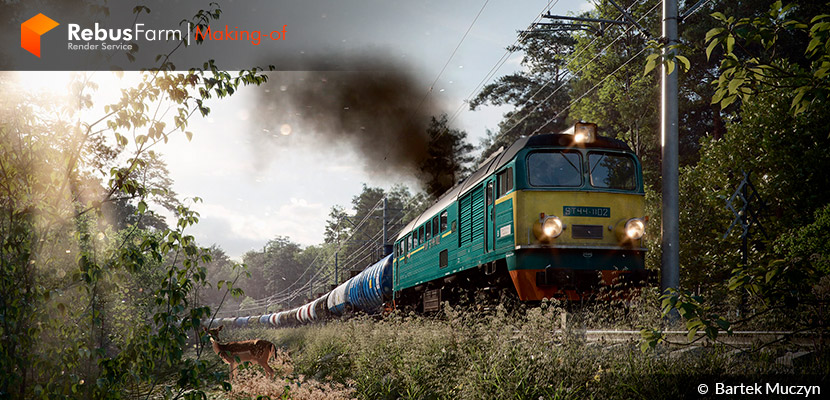
As artists, we often look for a good source of inspiration before starting a project. There were so many things that could impress us when we were kids. Our memories are from flavors, smells, toys, or even simple objects. Bartek Muczyn from MOFO ArchViz recalled from his memories the horn and smell of a train, sitting close to nature and waiting to see it passing in front of him. An emotional making-of article that has been created with pure love for 3D Art. Enjoy it!
About me.
Hello!
My name is Bartek Muczyn and I work in the 3D ArchViz industry for almost 20 years. In my whole career, I was working on architectural visualization as a full-time job, and recently I've started running my freelance studio called "MOFO ArchViz".
Creating 3D images, and playing with virtual lights, cameras, and geometry elements help me tell the story of my passion. I think I will never get tired of it. Today, I'm honored to have the opportunity to talk to you about my recent image "Mighty Gagarin" which I shared on VWArtclub Facebook *Group and it was selected in the TOP5 projects of the day.
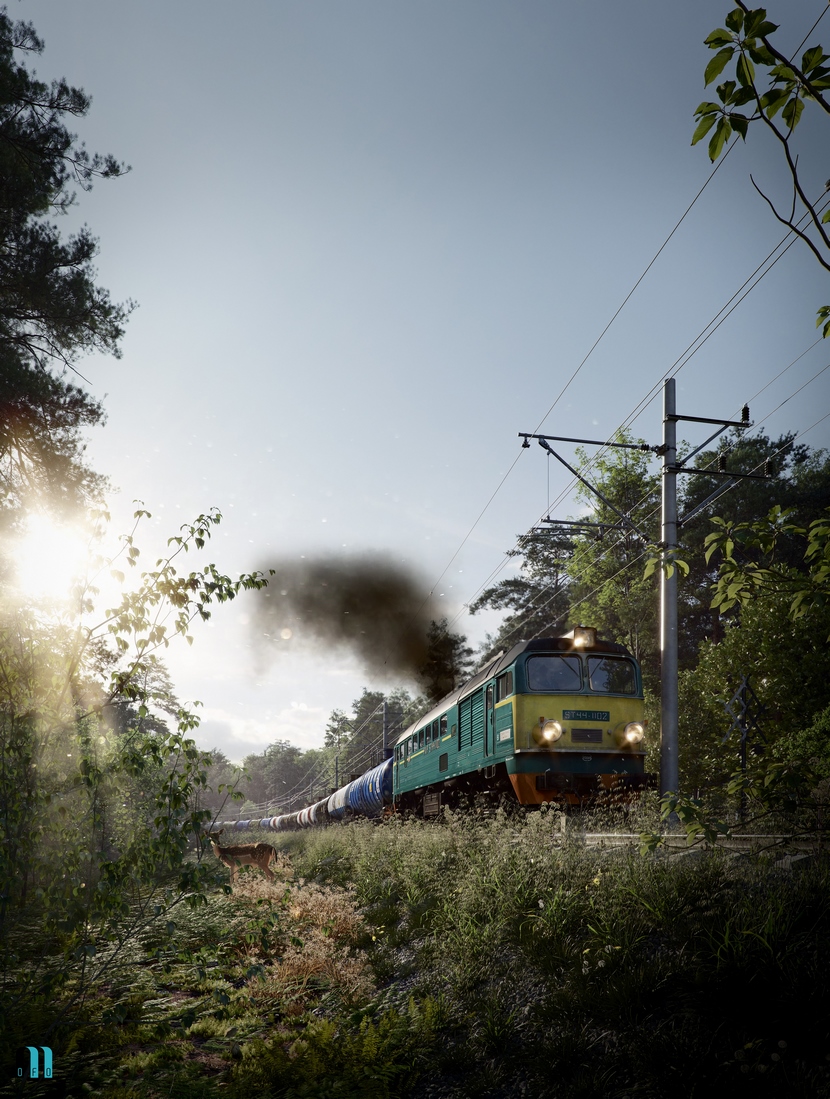
About the project.
I've always been fascinated with trains. As a kid, I used to sit down near railways watching trains passing. I was enjoying their sound and smell. The most exciting moment was waving to the driver and listening to the sound of the train horn.
Before I started creating the "Mighty Gagarin" image, I gathered a set of reference images. I wanted to capture an environment as wild and natural as possible. Also, the characteristic element of the presented locomotive – ST 44 is dense, black exhaust fumes. I found some references on YouTube and some others on Google.
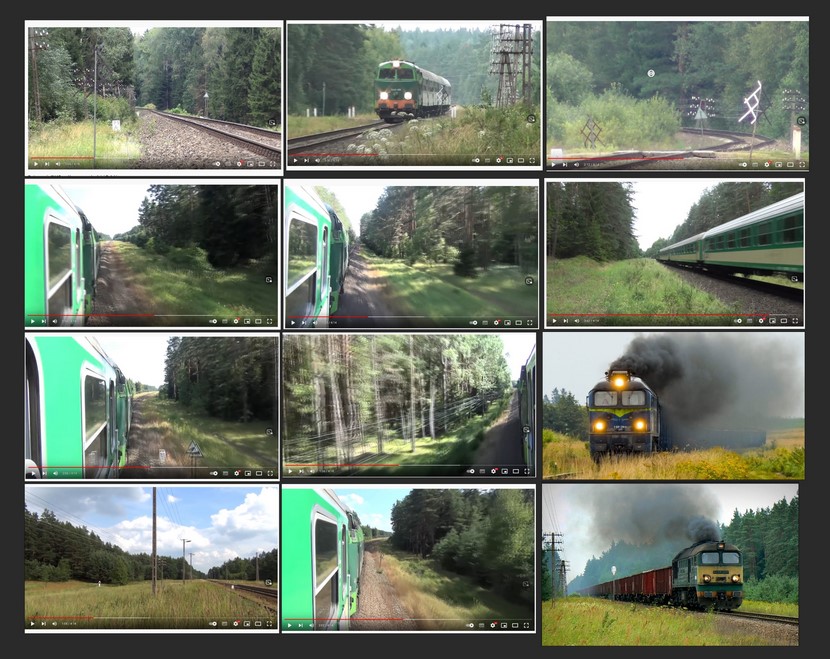
The "Mighty Gagarin" scene has been completely done in 3D. There are no matte paint elements, background replacement, or any other forms of mixing 2d and 3d (except the roe and the exhaust fumes of course).
Software used.
The whole scene has been done using 3DS Max and as a renderer, my weapon of choice, which is always V-Ray (V-Ray 5 in this case). I love it for its speed, quality, and reliability. As the main light source I used HDRI because, in my opinion, it gives the most natural and realistic illumination. Here you can see the complete scene in a medium gray override material.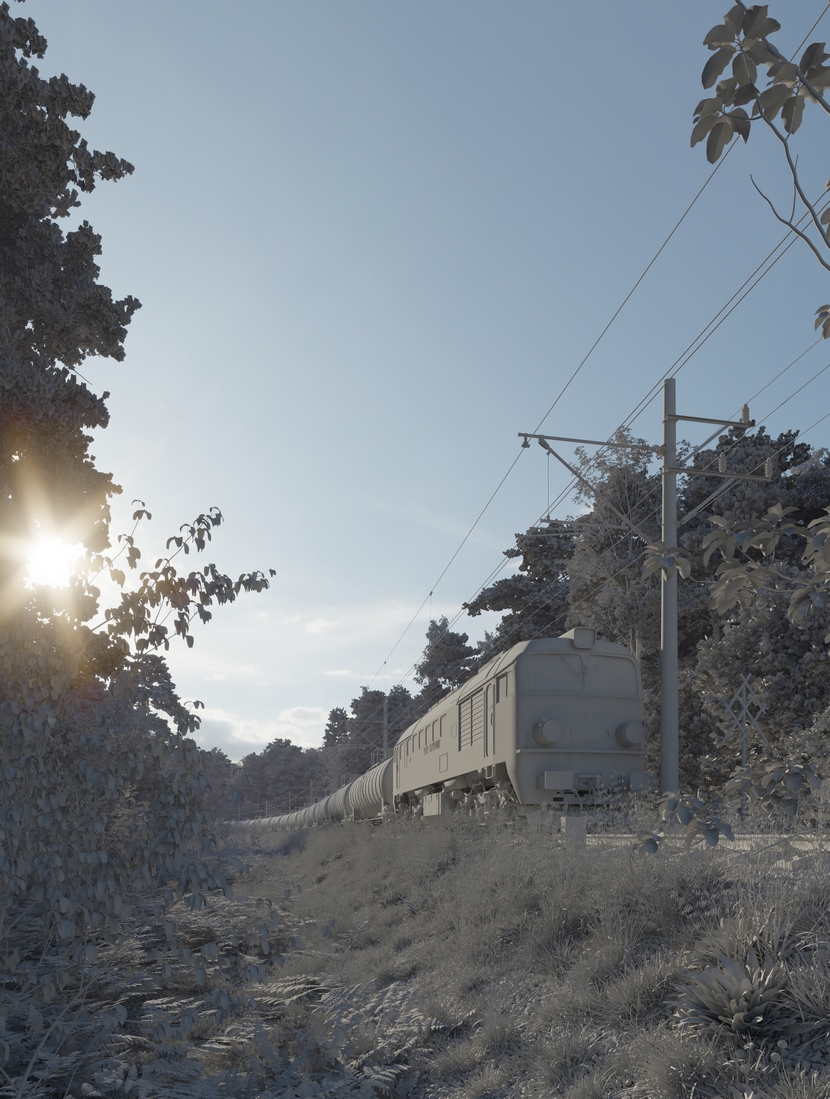
Modeling & Scene assets.
The main element of this scene is the train. I didn't model it, I just bought it on the internet market. It would have been too much, and time-consuming, to model it from scratch. Nevertheless, some other elements, like traction and tracks, was made by me. Modeling and scattering them gave me a lot of fun!
As always in such cases, I use RailClone Pro for parametric modeling. It's a powerful plug-in that allows you to make almost everything you can imagine. In this case, I used it to build the train, traction, railway embankment, and railroad tracks. Here's an example of a RailClone setup for tracks.
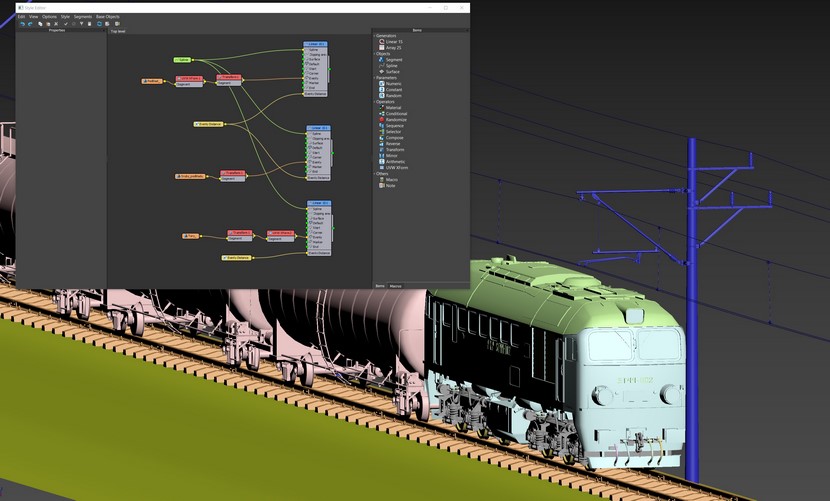
As you can see, it's pretty simple to build it. The train wagons, embankment, and electric traction have been built in the same way. The other ground has been made using regular poly-modeling and some procedural modifiers, like the noise modifier with its strength attenuation.
Greenery.
Besides the train, greenery plays also an extremely important role in my image. If the train is a singer, the greenery is a piece of music. There is no realistic scenery without great quality greenery models. I found some great-looking trees in my library. A mixture of coniferous and deciduous trees. I scattered them using another great plugin called ForestPack Pro. It is perfect for scattering objects like greenery, stones, and everything you want. Below, you can observe how I'm used to organizing 3D vegetation before scattering, and the official video explains very well how to use this handy plug-in!
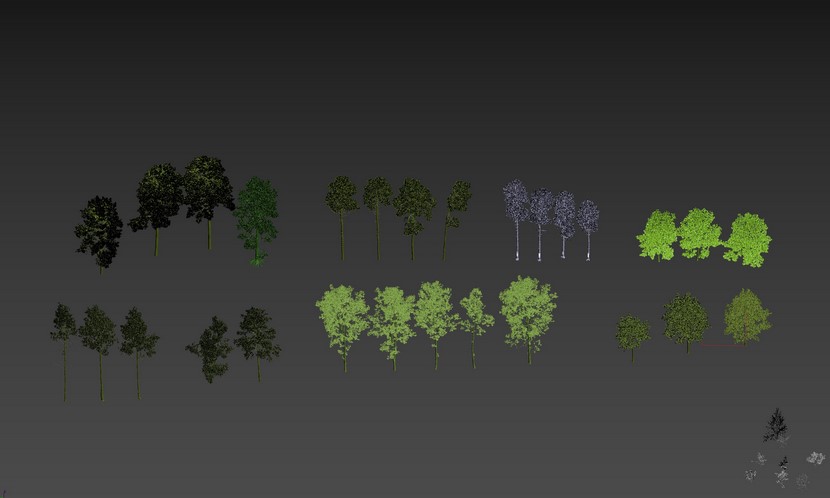
So, I split tees into layers: small trees, medium-sized trees, and big size trees. Beginning from the smallest ones – they are close to tracks and increase in size towards the background. As you probably noticed on reference images, locating trees in this way is how it also looks in the real world.
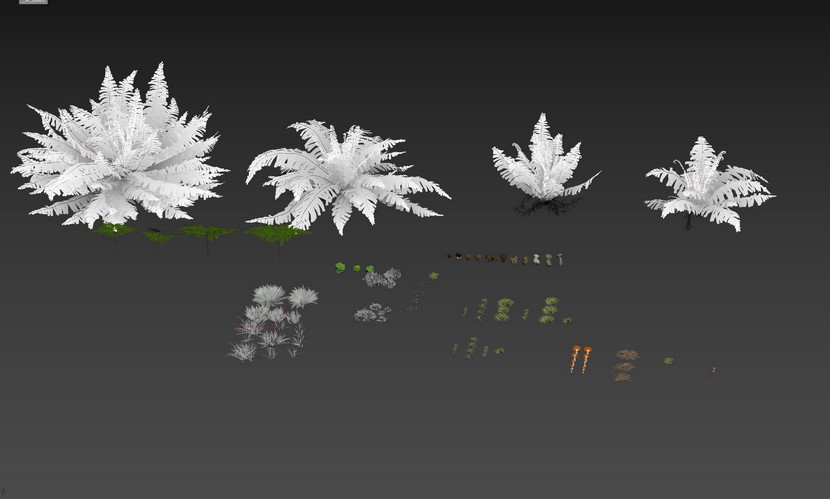
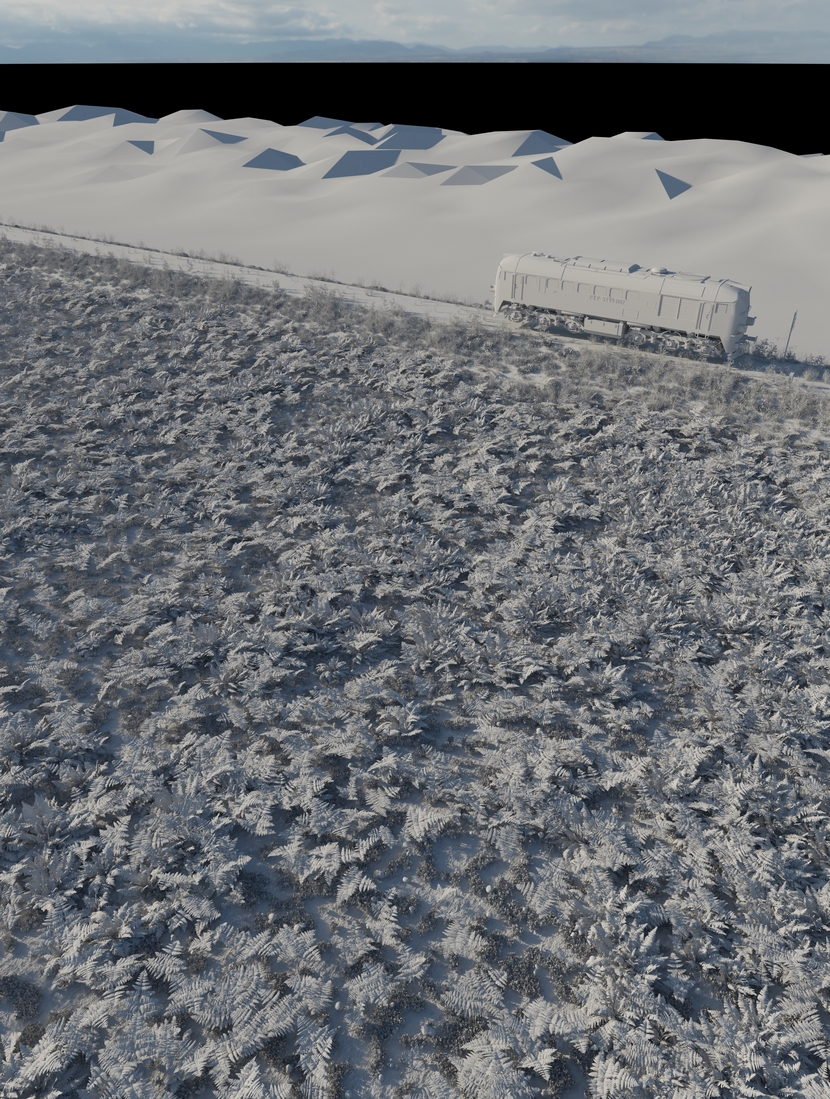
Now, there are tons of scattered low foliage. There are multiple types of ferns, moss, mushrooms, pinecones, weeds, grasses, pine needles, and bushes. Each plant type has been scattered with its ForestPack object, mixed and blended with others. I wanted to have the most possible control on it and not get messy, considering how many plants were used in total.
I used different ways of scattering: by texture, by manual painting areas, by include/exclude areas. I also used some great ForestPack features like distance density, and altitude/slope range. Here you can see the viewport grab and notice how complex the low greenery is.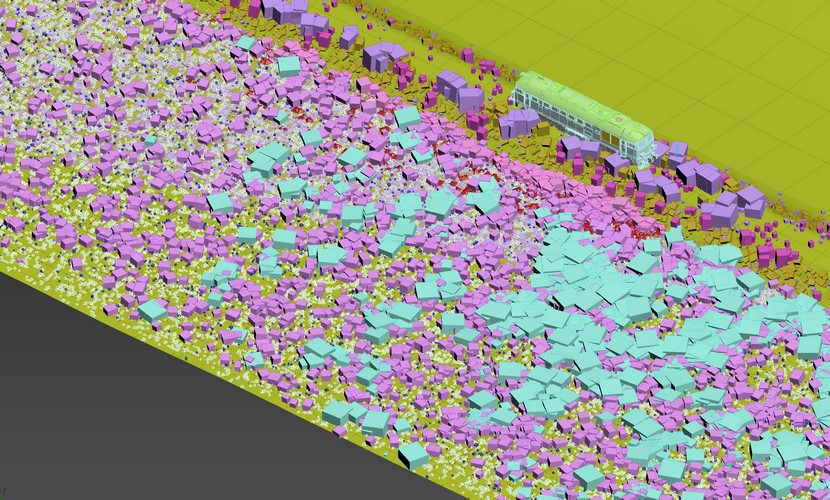
Composition.
From the beginning, I knew that I wanted to render an image in portrait proportions because of the ratio of the landscape and train. Too much greenery could ruin the composition. I used a nice script called "ImageCompHelper". This script aids in image composition inside 3DS Max by drawing guidelines on the active viewport. Several patterns can be visualized including the rule of thirds, golden ratio, golden triangle, golden spiral, etc. In this case, the golden spiral pattern was used.
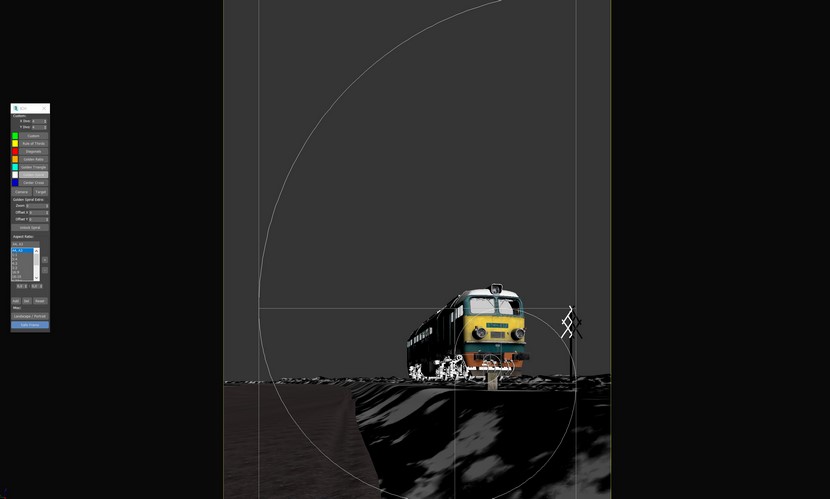
I tweaked the final target & camera position and that's it. The composition was ready!
Lighting.
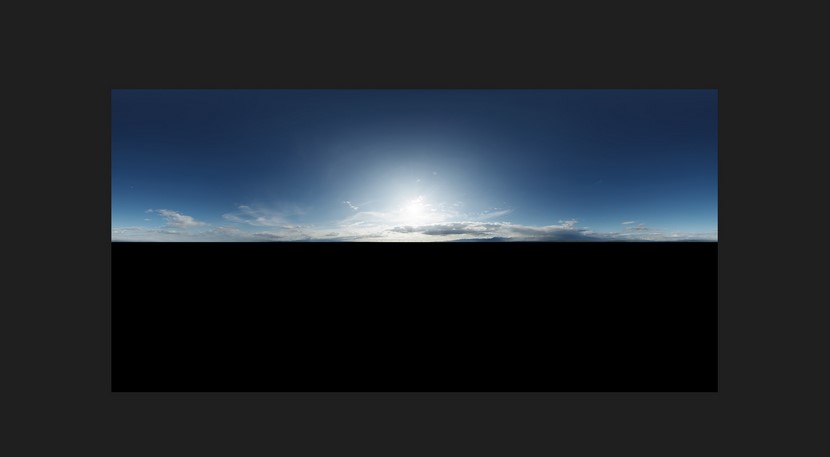
As I already mentioned, there was no room for cheating on realism. That was the reason I didn't use the default Sun + Sky scenario. It's far less realistic than a good HDRI. I very often use HDRIs from 3dcollective. They are some of the best you can get out there. In this particular project, I used number 071 from Real Light Pro Pack 02. It allowed me to achieve a nice, warm, summer-like mood, where you almost can hear the sounds of grasshoppers. That is how I was imagining summer, relaxation, and holidays in my memories since I was younger.
Render Setup.
Due to the fact I used HDRI and tons of coniferous trees, I had to set up some high settings to not lose all details. Antialiasing was crucial in this case.
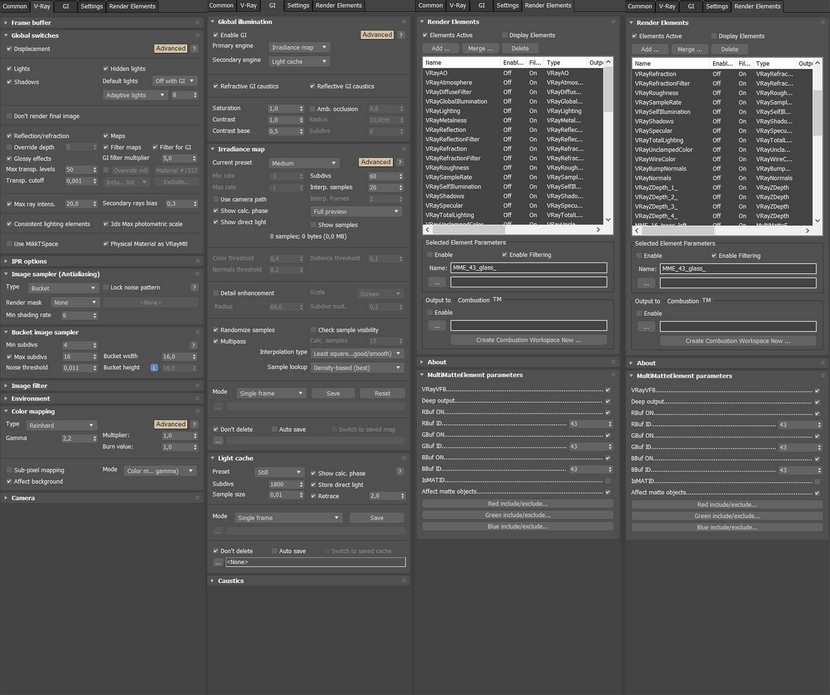
I also added the environmental effect "VrayAerialPerspective" as a nice detail and element of realism. 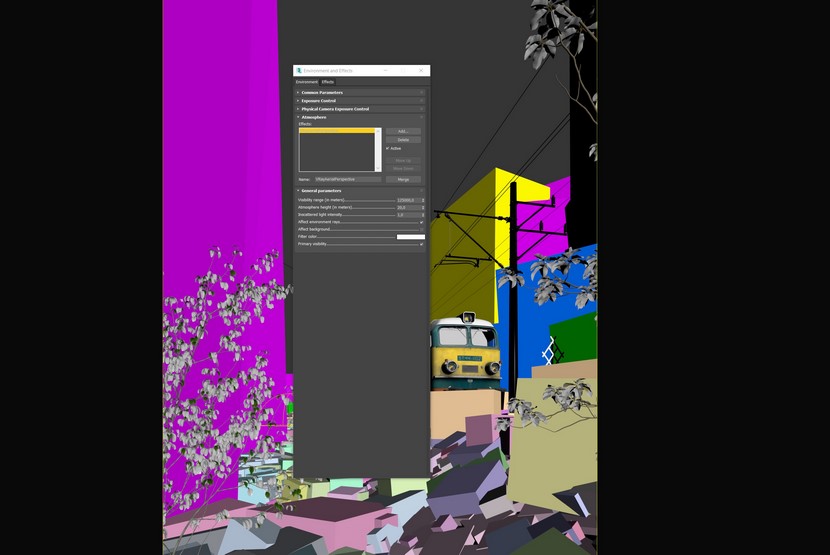
The rendering process took about 1,5 hours on Threadripper 3990. Output image resolution was 4K. The most time-consuming part of rendering was the coniferous trees, because of the number of their needles, they are tiny, dense, and with the translucency, feature turned on.
Post Production.
I mainly use Photoshop while working on still images for post-production. There were no fancy techniques during this process. Just regular color corrections, some reflections enhancing, adding chromatic aberration, grain and vignette, some bloom and glare, and of course some additional fine details, like heat distortion from the locomotive's engine (just above it).
To be honest, I didn't even replace the sky and I left it straight from the HDRI map. When I was convinced that the process is done, I checked the final image on 4 different displays:
- LED monitor for photographers
- LED monitor for designers
- Ipad
- iPhone.
Why I'm doing that? Because the image may look good and realistic on one display, but be different, with poor quality and unrealistic, on another one. With this small trick, I can simply check if the image looks good on all of them. Below you can see the raw render and final post-produced image.
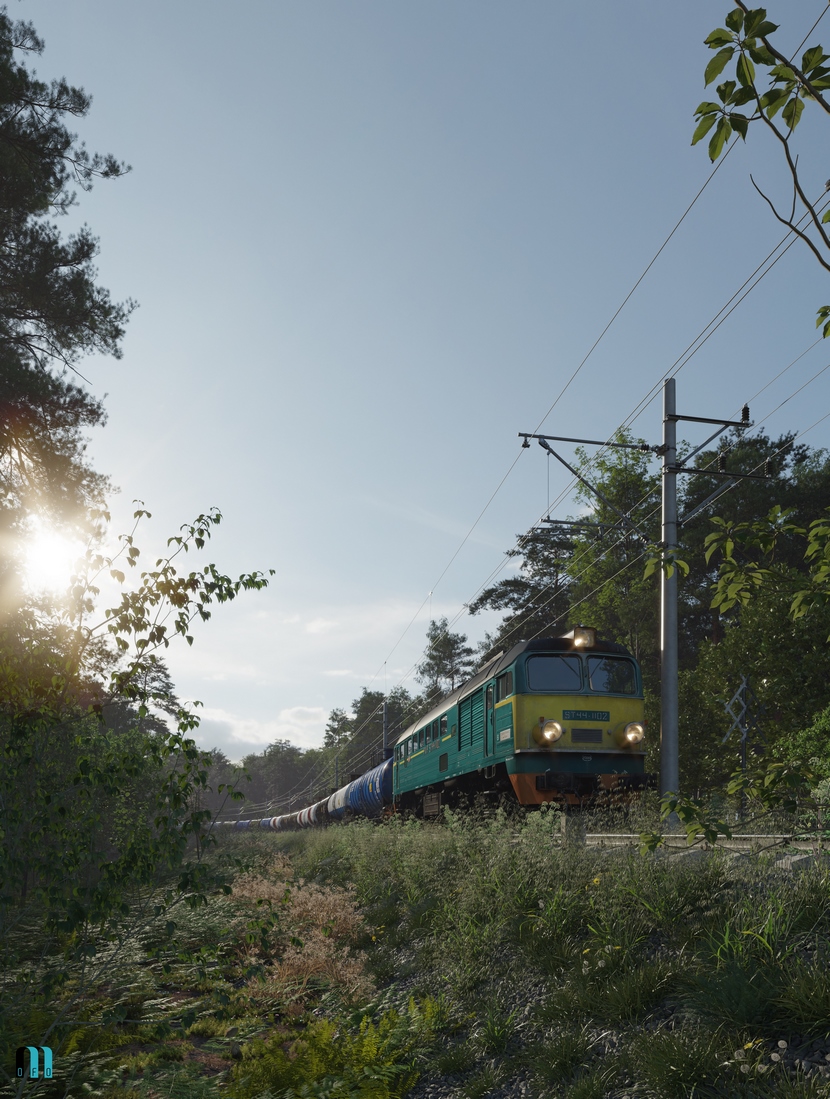

Thank you for joining this making-of journey. I hope you liked it and you found it useful. Stay safe and keep rendering!
With kind regards,
Bartek Muczyń.
Check more of Bartek's work on these channels:
Want to share your work with our community too?
Contact us at 该邮件地址已受到反垃圾邮件插件保护。要显示它需要在浏览器中启用 JavaScript。and tell us about your favorite project.
Get started with your own renderings
